-1. You can connect to remote server via local virt-manager on your desktop
- Press File -> New connection-> select checkbox ssh and specify user and server.
- Or directly from command line:
virt-manager -c "qemu+ssh://YOUR_USER@YOUR_SERVER/system"
- You need to ensure that this user can connect to libvirtd and add your ssh pub key to that user .ssh/authorized_keys).
- usermod -G libvirt -a <YOUR_USERNAME>
- usermod -G kvm -a <YOUR_USERNAME>
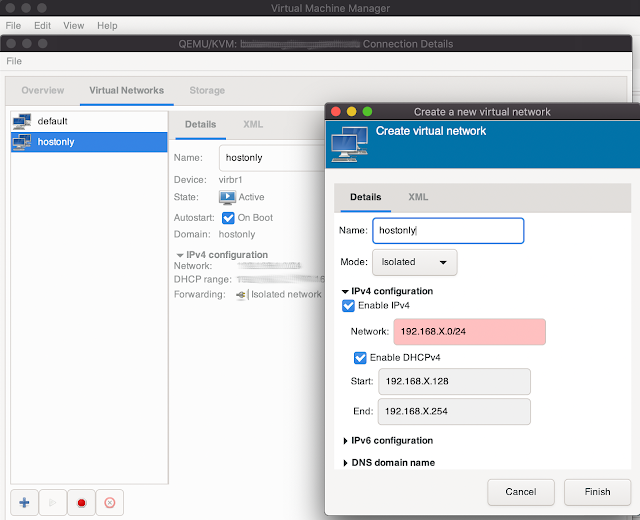
0. How to add network interface/type like HOSTONLY
In virt-manager press Edit -> Connection details -> "press +" -> set your network range and select Isolated

1. Press the icon under File

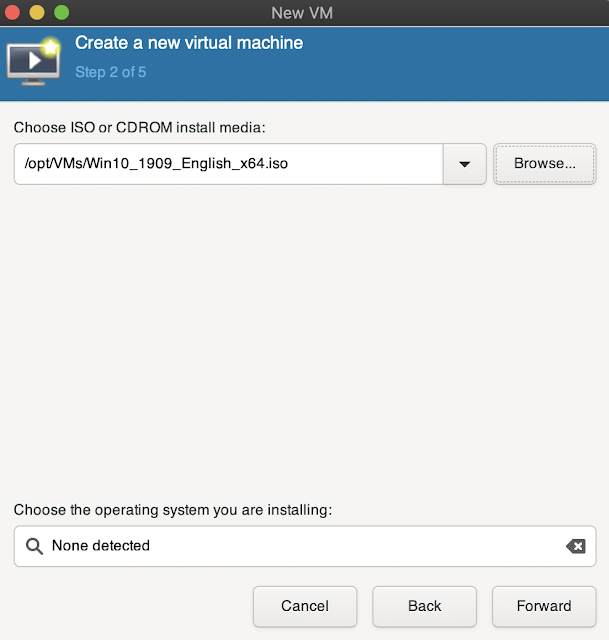
2. Select iso or any other way to install it, we will use ISO for this tutorial

3. Specify path to ISO

4. Set ram memory and number of CPUs for the vm

5. Create a specific hdd for vm, see Select or create custom storage, press Manage, see next screens

5.1 Set vm name, size > 100GB and format qcow2

5.2 Select new created image and press Choose Volume

6. Select Customize configuration before install, to be able to apply antivms and press finish

7. VM detailed configuration, in Overview select XML and follow instruction from this blogpost for antivm. IMPORTANT: use i44fx for <= Windows7, Q35 has better performance, but not supported out of box till Windows 10


9. Inside of the CPU type disable Copy host CPU configuration if is server cpu as XEON, and send one that you like, this is tricky part, if you selected cpu type that isn't compatible(cpu features) with your server cpu, your vm can be slow, so here you will need to play on your own, but think about real world cpu types NOT:

10. Set the Performance option as on this image

11. Networking, fake your MAC address and I strongly recommend to use hostonly instead of NAT

12. Press Apply, than Being Installation and do your OS install
13. To take snapshot: Press last icon you can see it selected like screen with play inside, then + at the bottom, set your snapshot name and press finish

Enjoy
Hi Doomedraven, how would you go about using host only in KVM? With VBox it'S pretty easy with a HostOnly and using iptable entries (which can be found using a quick goole) but how would that work with an isolated nic and using iptables? (I've tried but can't get the guest vm to communicate with the internet)
ResponderEliminarCheers
anykeypress
Hello, it works just fine with hostonly, you just need to add another networking, this is just example for my friend. Vbox is malware detection friendly so i don't use it at all, only kvm :)
ResponderEliminar